Rafa Juárez
Published © GPL3+

Arduino 101 Blynk and BLE Example Panel

An example of Blynk app linking the mobile to the Arduino 101 using Bluetooth Low Energy BLE.

BeginnerProtip1 hour4,197
Arduino 101 Blynk and BLE Example Panel

Things used in this project

Hardware components

Arduino 101
Arduino 101
×1

Software apps and online services
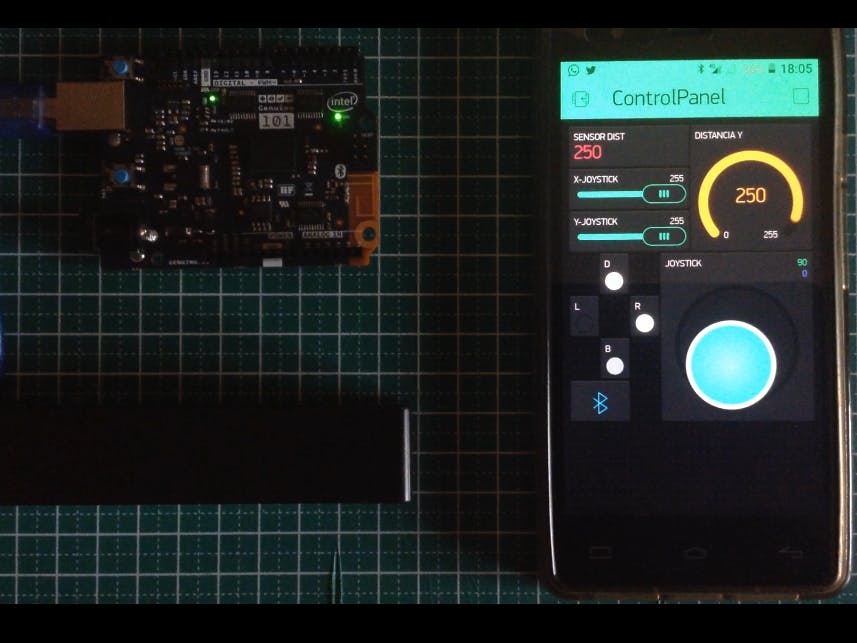
Blynk
Blynk

Story

Read more

Code

CODE

Arduino
This code is a demostration of how to use Blynk BLE (BloueTooth Low Energy of the Arduino 101) to read and write values on the Mobile Blynk APP
/**************************************************************
 * Blynk is a platform with iOS and Android apps to control
 * Arduino, Raspberry Pi and the likes over the Internet.
 * You can easily build graphic interfaces for all your
 * projects by simply dragging and dropping widgets.
 *
 *   Downloads, docs, tutorials: http://www.blynk.cc
 *   Blynk community:            http://community.blynk.cc
 *   Social networks:            http://www.fb.com/blynkapp
 *                               http://twitter.com/blynk_app
 *
 * Blynk library is licensed under MIT license
 * This example code is in public domain.
 *
 **************************************************************
 *
 * This example shows how to use Arduino 101 CurieBLE
 * to connect your project to Blynk.
 *
 * Note: This requires CurieBLE library
 *   from http://librarymanager/all#CurieBLE
 *
 * NOTE: BLE support is in beta!
 *
 **************************************************************/

//#define BLYNK_USE_DIRECT_CONNECT

#define BLYNK_PRINT Serial

#include <BlynkSimpleCurieBLE.h>
#include <CurieBLE.h>

// You should get Auth Token in the Blynk App.
// Go to the Project Settings (nut icon).
char auth[] = "65176043c54744dbb5615ff0a722898a";

BLEPeripheral  blePeripheral;

 //Configuration of the widges used at the Blynk panel in the mobile
    WidgetLED led_D(V0); // Moving Forward
    WidgetLED led_R(V1); // Moving To right
    WidgetLED led_L(V2); // Moving To left
    WidgetLED led_B(V3); // Moving Backward
void setup() {
  Serial.begin(9600);
  delay(1000);
  pinMode(13,OUTPUT);
  blePeripheral.setLocalName("Blynk");
  blePeripheral.setDeviceName("Blynk");
  blePeripheral.setAppearance(384);
  Blynk.begin(blePeripheral, auth);
  blePeripheral.begin();
  digitalWrite(13, HIGH);
  

  Serial.println("Waiting for connections...");
}
/**************************************************************

 * You can receive x and y coords for joystick movement within App.

 *

 * App dashboard setup:

 *   Two Axis Joystick on V10 in MERGE output mode.

 *   MERGE mode means device will receive both x and y within 1 message

 *

 **************************************************************/
BLYNK_WRITE(V10){
    int valueX = param[0].asInt(); // Get the value from the Joystick X value
    int valueY = param[1].asInt(); // Get the value from the Joystick Y value
    Serial.print("X = ");Serial.print(valueX);Serial.print("; Y = ");Serial.println(valueY);
    Blynk.virtualWrite(V9,valueX);Blynk.virtualWrite(V4,valueY);
    digitalWrite(13, LOW);
    delay(50);
    digitalWrite(13, HIGH);
    delay(50);
    digitalWrite(13, LOW);
    delay(50);
    digitalWrite(13, HIGH);
    delay(50);
}

void loop() {
  Blynk.run();
  blePeripheral.poll();
  test();
}

void test()
{
  Blynk.syncVirtual(V10); //Requests to update this virtual pin
  led_D.setValue(255);
  delay(100);
   led_R.setValue(255);
  delay(10);
   led_B.setValue(255);
  delay(10);
   led_L.setValue(255);
  delay(10);
   led_D.setValue(0);
  delay(10);
   led_R.setValue(0);
  delay(10);
   led_B.setValue(0);
  delay(10);
   led_L.setValue(0);
  delay(10);
  for (int a=0;a<=255;a=a+25){
    Blynk.virtualWrite(V5,a);
    Blynk.virtualWrite(V6,a);
  }
}

Credits

Rafa Juárez

Rafa Juárez

18 projects • 39 followers
Very interested in prototyping of new ideas. 30 years experience in electronics.

Comments