IntroductionThis is a team project for MIT class, Principles and Practice of Assistive Technology (6.811J/HST420J/2.78). Our team's client, Ashley, wants to be able to read signs and building names.
We came up with the following problem definition.
“Design a set of devices, no larger than a standard pair of glasses, to help Ashley correctly read important signs and building names up to 30 ft away under any lighting conditions within 2 seconds of seeing a stationary view. The device should not require internet connection, lasts for 6 hours after fully charged, and does not obstruct her hearing.”
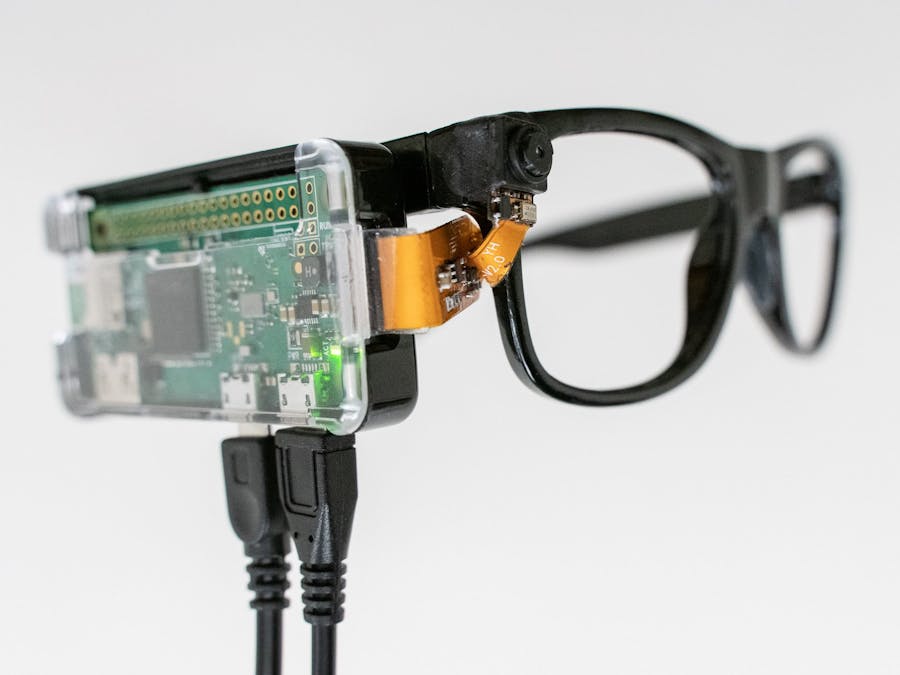
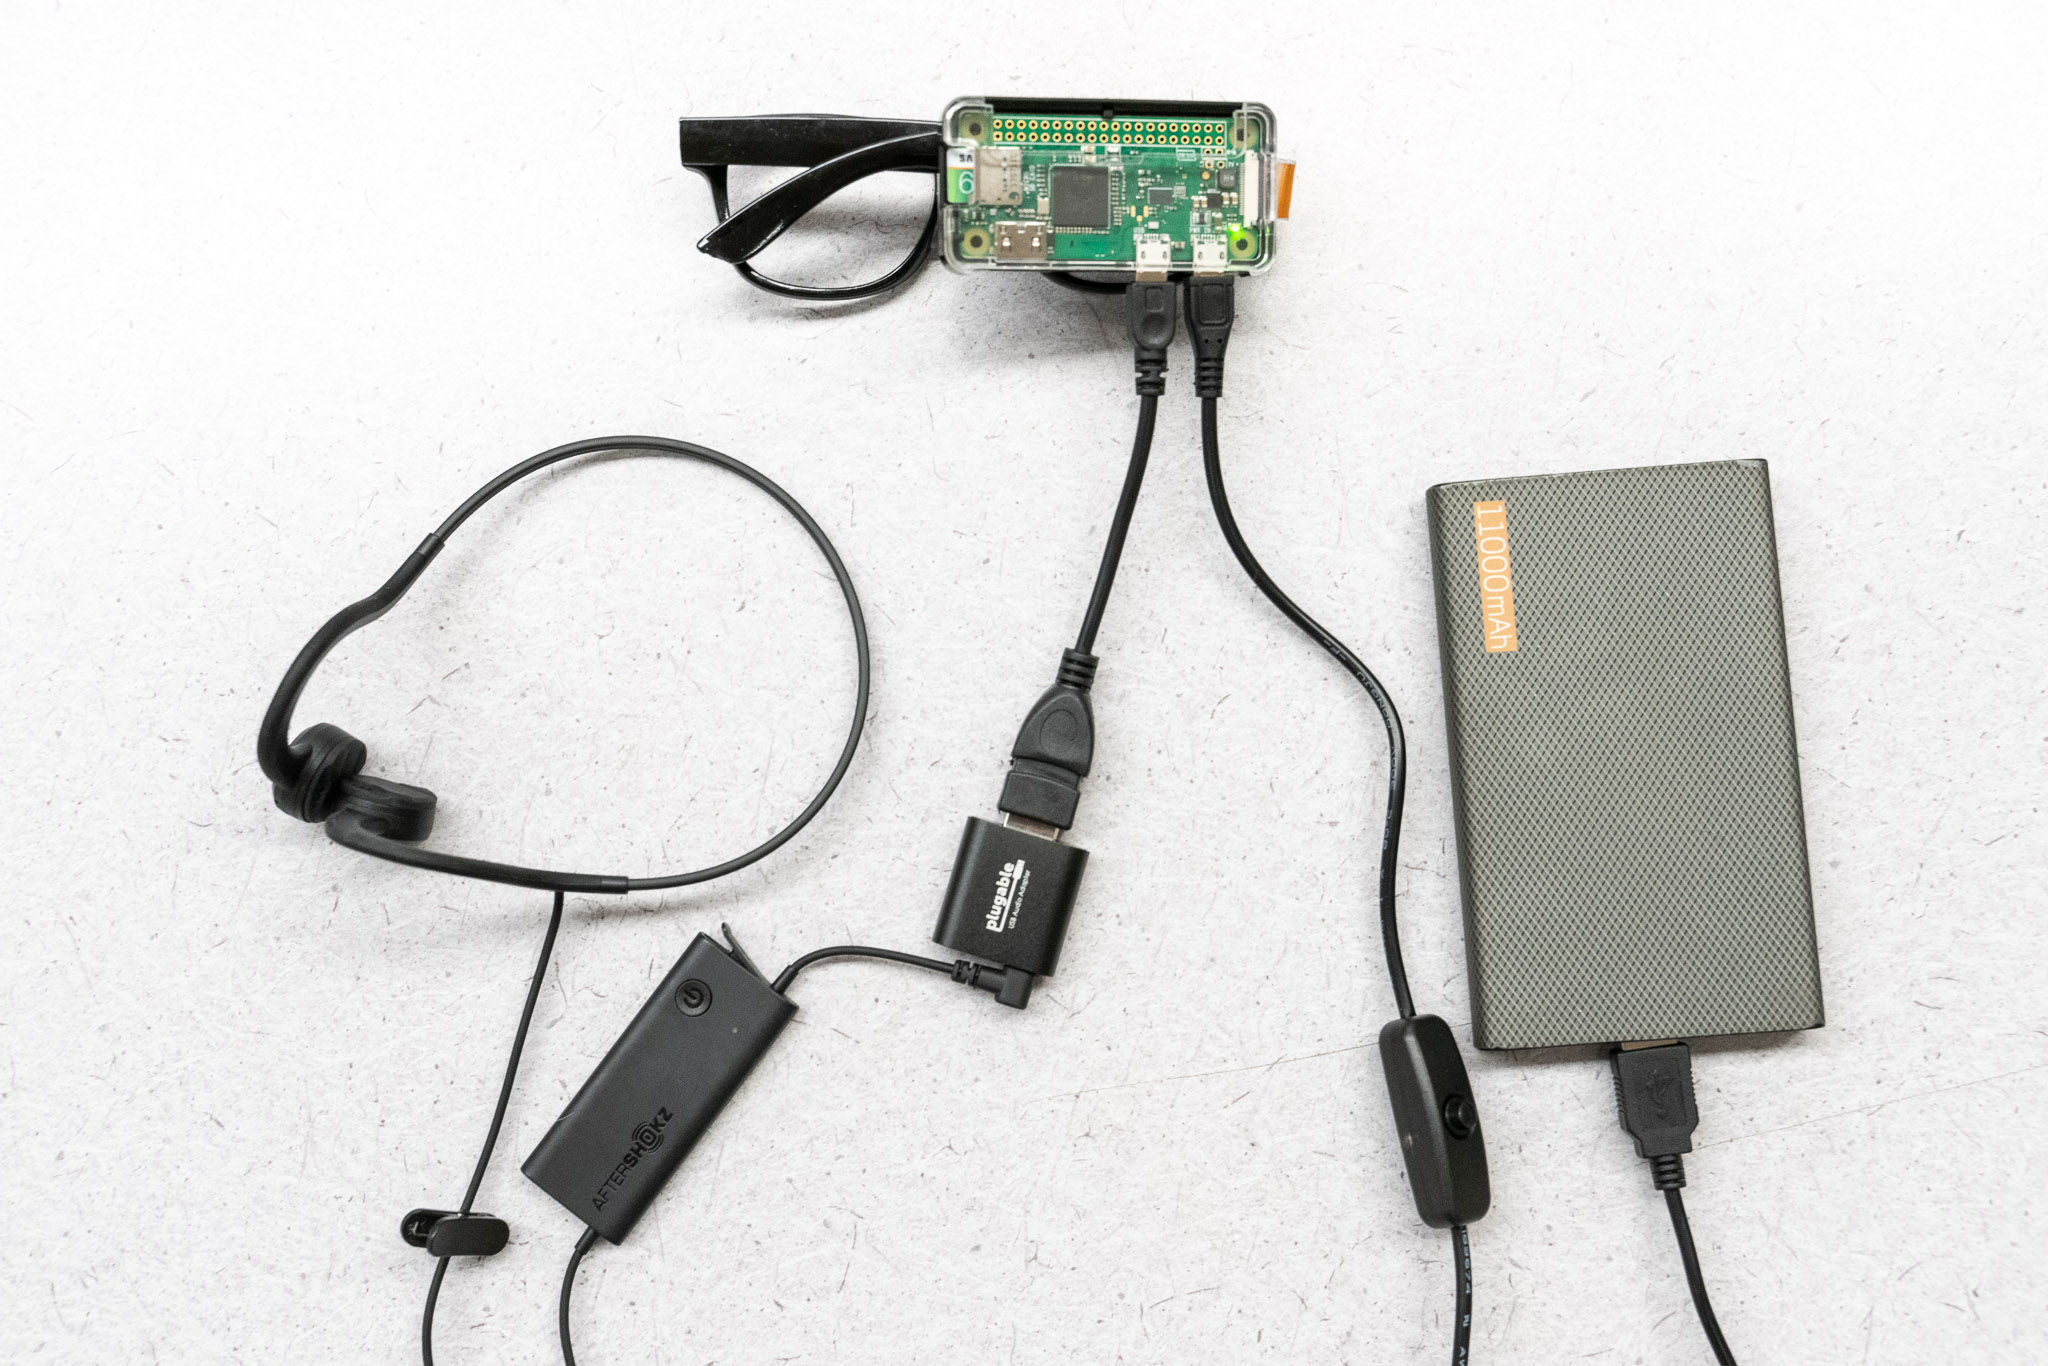
Hardware Components- Raspberry Pi Zero W: This low cost, portable computer is the central part of the system. It is only 66.0mm x 30.5mm x 5.0mm in size, only weighs 9.3 grams, can connect to WiFi, and is capable of doing tasks that a desktop computer can do, including running Python scripts. We can do any computations tasks on this device.
- Zero Spy Camera for Raspberry Pi Zero: This 8.6mm x 8.6mm x 5.2mm camera can connect to the Pi via the CSI bus. The sensor’s resolution is 5 megapixel. This is an input device to take images of the environments and send them to the Pi for further processing.
- 11000 mAh Power bank: Pi comes with a home charger as a power source, but we want to walk and experiment with our vision system just like Ashley will use it in daily life, so we come up with a hacky solution to use our own power bank during testing. Note that since we have to prioritize other tasks, we didn’t have time to make an integrated power source, but we are exploring that option.
- Bone Conduction Headphones - We started testing with bone conduction headphones in this prototype to see how well bone conduction will work among noisy environment, in case we need to switch back to typical headphones. We chose the most basic commercial bone conduction headphones, AfterShokz Sportz Titanium. (There are wireless options available, but they are more expensive.) Like a speaker or earphones in Prototype 1, the headphones connect to the Pi via the USB OTG port and USB audio adapter.
- Glasses - We chose a pair of glasses with thick temples, which are good for the Pi’s attachment. The Pi was attached with transparent tapes. However, the frame was made of plastic, which turned out to slip from her nose too easily, especially when the Pi added an extra weight on one side.
- Sugru Mouldable Glue - This glue is pretty versatile, as it allows you to mould it for 30 minutes before turning into a silicone rubber in 24 hours and it sticks to almost any surfaces. We use Sugru to attach the Pi and the camera to the glasses frame. You can use in other projects as well!
The camera is oriented on the right side of the glasses; however, in previous iterations, keeping the camera flex straight resulted in using the portrait orientation, which is unnatural for navigation purposes. Therefore, we use a folded-camera flex design to elevate the camera. This flex needs to fit well when the glasses are both open and closed. Using Sugru, we tilted the camera at a small angle when mounting it so that the user can read most street and building signs, which are above eye-level.
1 / 3 • Closed glasses. The camera flex still fits well in this position.
- Capturing images: The picamera package is a Python interface to the Raspberry Pi Camera module. Our program automatically captures an image every two seconds and stores a JPG file temporarily.
- Text detection: We send a captured image to Google Cloud Vision API, which returns a response of detected texts and each text’s bounding box coordinates within the image. However, this requires internet connection to connect to the online API.
- Text-to-speech (TTS) conversion: We have tried several options that are available on Raspberry Pi. The best offline solution we've found is using
pico2wave to convert a string into a wav file and aplay to play the file. Another solution which gives better sound quality but requires internet connection is Google Translate API. However, this is not officially supported - Directional Cues: We are able to use information received from Google Vision regarding relative location of text within the camera view to give the user directional cues. For example, given text that is largely on the bottom part of the screen, the device will alert to the user "Please move down" for better processing.
- Filtering: We implement several post-processing methods. First, we allow for the filtering of text based on relative sizes. Assuming that large text is more important for the user (since this project is mainly focused on reading signage), we filter out small text and sentences longer than a certain word length that might be considered "unimportant" in relation to the larger text and therefore will not be conveyed to the user. This is to avoid overwhelming the user with unimportant information in the scene. However, if only few text boxes are detected in the scene, we disable filtering to avoid getting rid of small text that might come from far-away buildings. All of these parameters are tunable by the user.
- Autocorrection: We also implement autocorrection on the words detected by the device. As Google Vision will sometimes produce erroneous results, we employ a trie data structure with a dictionary of words. We use the confidence returned from Google Vision to correct the lowest-confidence characters in every word.
A diagram of our software system is described below. The camera from the glasses takes an image and sends it to Google Vision for image processing. The Pi then takes this information, performs some post-processing, such as finding directional cues, filtering out unwanted texts, and autocorrecting the words. It then uses speech-to-text to convert this information into an audible format for the user.


Comments